|
|
Post by synicbast on Mar 17, 2016 5:54:32 GMT
|
|
|
|
Post by synicbast on Mar 17, 2016 6:09:07 GMT
|
|
|
|
Post by synicbast on Mar 17, 2016 6:48:58 GMT
|
|
|
|
Post by synicbast on Mar 17, 2016 7:14:00 GMT
|
|
|
|
Post by synicbast on Mar 17, 2016 7:34:15 GMT
|
|
alex
New Member

Posts: 28 
|
Post by alex on Mar 17, 2016 9:21:22 GMT
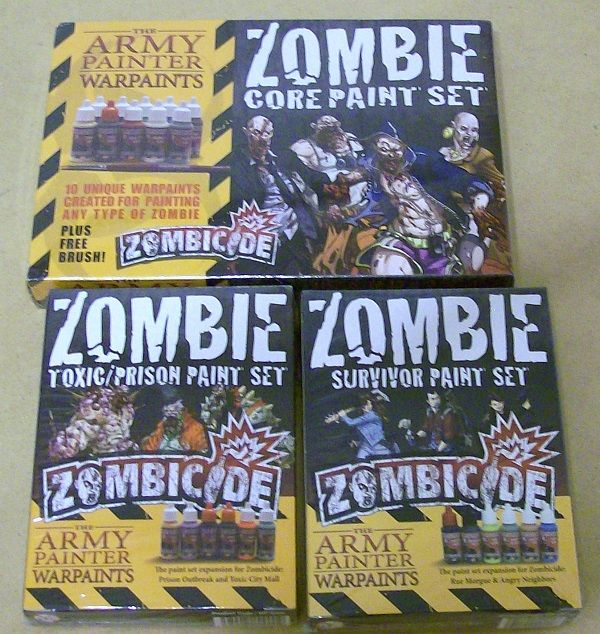
Hot damn man, your clearly and old hat at this, im keen to see your progress as time goes on. The zombicide paints are on my list of things to buy as well...i just need to wait for funds to replenish.
whats the plan for the 3 spray primers? One for zombies one for survivors and one extra? Im intrested to hear what your going to use them for. I was just going to go with bone white for everything but youve got me reconsidering now...
Anyway, im going to be watching this thread (along with the others of course) very intently.
|
|
|
|
Post by synicbast on Mar 17, 2016 9:29:13 GMT
When working with plastic models, mould lines are often the source of much frustration and sometimes the model suffers from the knife commonly used to reduce mould lines: A few years ago, I visited the american online mecca of modelling tools: Micro-Markand picked up these three items. Pricy but they will last for ever: 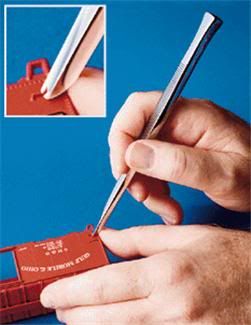 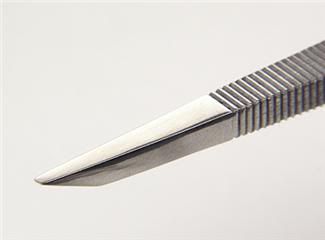 A 4mm (left) and 2mm (right) chisel designed with rounded corners specificalkly for paring plastic and wood. The other tool is a deluxe deburrer 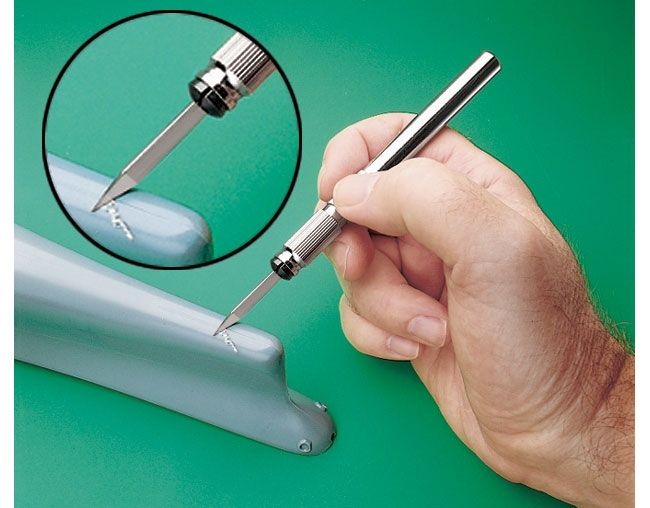 |
|
|
|
Post by synicbast on Mar 17, 2016 9:33:33 GMT
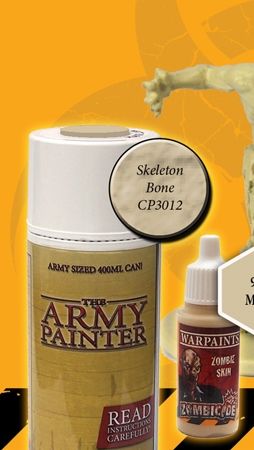
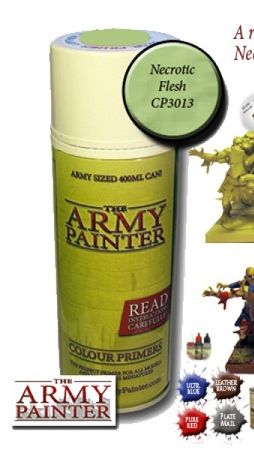
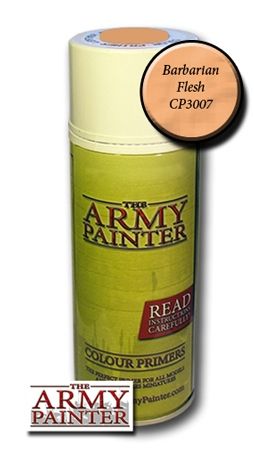
Hot damn man, your clearly and old hat at this, im keen to see your progress as time goes on. The zombicide paints are on my list of things to buy as well...i just need to wait for funds to replenish. whats the plan for the 3 spray primers? One for zombies one for survivors and one extra? Im intrested to hear what your going to use them for. I was just going to go with bone white for everything but youve got me reconsidering now... Anyway, im going to be watching this thread (along with the others of course) very intently. The three sprays are as recommended by Army painter for the various painting guides... Barbarian Flesh used for Humans and a base for the fresh dead, Skeleton Bone for the not so fresh, and necrotic flesh for those much more advanced Zombies... Also I like the idea of some variety in shading. Remember Im coming back to painting after a long hiatus and I have found that I learn best through keeping things simple and organised...there's nothing wrong with the paint by numbers route'in my opinion, so I'm more than happy to follow along with the Army painter guides initially and use some of the You Tube how to paint guides for additional ideas. |
|
|
|
Post by zombiespider on Mar 17, 2016 11:04:29 GMT
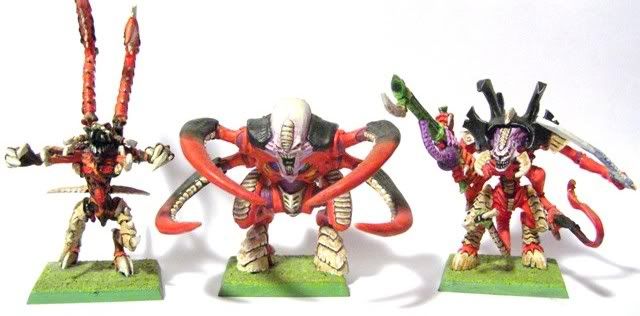
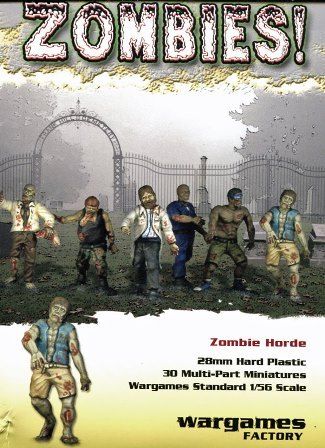
The Army Painter Youtube channel is brilliant, I recommend it to anyone and everyone no matter how advanced you are  Great setup you have there and far more organised than mine is, though I am restiriced to painting on my bed since it is the only place in the house that gets enough natural light (trees block a lot of the light from other windows, grr). Those tools for removing mold lines are a godsend, I picked one up ages ago and still use it today and keep planning to get some larger ones since I have worked on so many large resin models where my little 2mm hasn't quite been up to the task. With the zombies you picked up I strongly recommend scrubbing them, leaving them to dry and then giving them a 2nd wash and a good scrub. The Wargames Factory zoms tended to have a lot of mold release on them and 1 wash wasn't always enough to clean them up properly, even going in really well with a toothbrush didn't always get it all off the first time  . The Apocalypse Surivor boxes were amazing though and check out the weapon sprues! You can use them to decorate weapon raxks ans ao on, which is what I did with a few of mine heheh. I look forward to seeing you work as it progresses, I love your painted nids, but I always was a sucker for the original minis from the RT era  |
|
|
|
Post by Troy (Admin) on Mar 17, 2016 11:10:28 GMT
Great Start to your project log, I am looking forward to following along with this! I need to invest in one of those deluxe deburrer. I actually can't believe I didn't think of that before now considering I had a work term during my college days in a manufacturing shop and used one all the time. I have been using a modeling knife to remove mold lines for the last 10 years, and the blades don't last that long. I remember the deburrer tool being very durable when used on metals, so plastics should be a breeze for it, thanks for the tip!
|
|
|
|
Post by synicbast on Mar 17, 2016 11:35:42 GMT
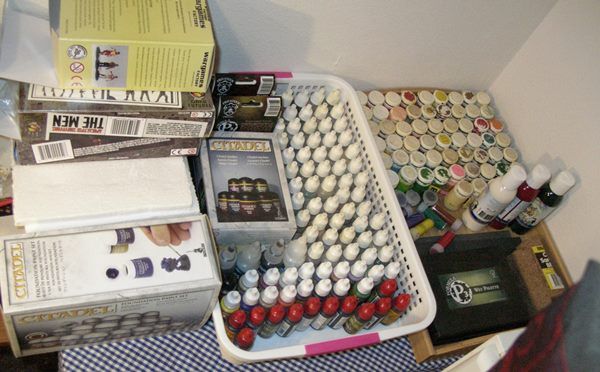
My Philosophy:
My dad was a fully qualified Fitter & Turner with his apprenticeship done in the late 1930s, so my philosophy towards tools and work materials is a direct result of his. He made my first softball bat on his home-built lathe, constructed and carved my first skateboard deck from Marine-quality 6-ply plywood back when cheap plastic decks were all you could getother than ordering from the 'States and bless his heart, left enough room in his workshop for me to have a dedicated 8' by 4' wargaming table.
- Tools need to be quality manufacture and
fairly priced to match. Brand is immaterial. You can get excellent
quality tools from electronics stores, home handyman stores without
buying into hobby branding.
- Maintenance is everything. Look after your tools and they will look after you.
- Use the right tool for the right job.
- If you find a tool (brush, paint colour etc) that works for you, buy enough to last you for the next two to three projects.
- Prior Planning and Preparation prevents p#ss-oor performance.
- Take your time. You're not working for anyone else, just yourself. Would you be satisfied with a sacrifice of quality over quantity if someone else was doing this for you?
- Be realistic in your expectations - you won't get A-grade results immediately.
- Reward yourself at each stage you accomplish.
You won't see me buy any GW paints or tools, as I can get better value and often better quality from other sources and always cheaper.
2.
|
|
|
|
Post by synicbast on Mar 17, 2016 12:44:11 GMT
My Current Brush set (to be expanded a little)
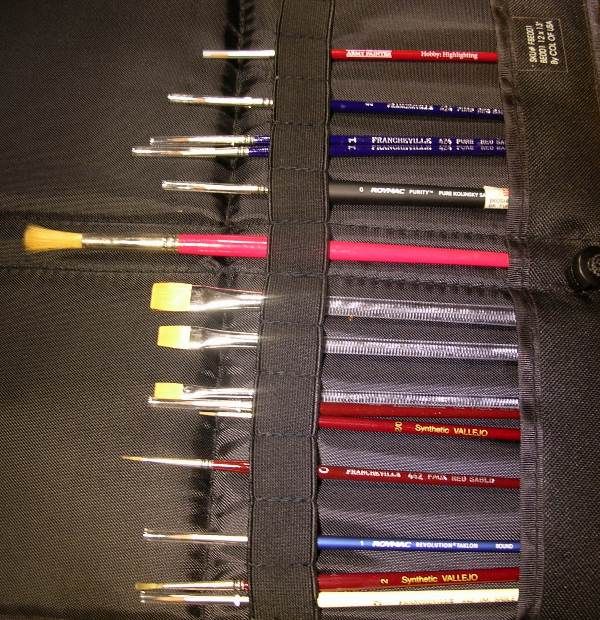
From Top to Bottom
- Army Painter Highlighter (free with the Zombicide Core set)
- Francheville 424 #2 Red Sable (from Spotlight approx AUD$5)
- Francheville 424 #1 Red Sable (from Spotlight as above)
- Francheville 424 #1 Red Sable (from Spotlight as above)
- Roymac Purity #0 Kolinsky Sable (AUD$9 from Eckersley Arts and Crafts) - my favourite brush handle of them all Purity
- Dollar shop brush (soft bristles and incredibly useful for general purposes)
- Royal Art #5 chisel - edging and blocking (set of three Royal Art Brushes for $2)
- Royal Art #3 chisel - edging and blocking
- Royal Art #1 chisel - edging and blocking
- Francheville 442 #00 synthetic
- Vallejo #00 synthetic - freebie from Battlefront's main sculptor
- Francheville 442 #0 synthetic
- Roymac Revolution #1 Taklon synthetic (from Eckersleys, the sales spiel got me - Roymac Revolution website )
- Vallejo #2 synthetic - freebie from Battlefront's main sculptor
- Francheville 442 #2 synthetic
|
|
|
|
Post by synicbast on Mar 28, 2016 6:30:49 GMT
A couple of new Kickstarters I'm adding to my ever-increasing 28-32mm lead addictionWastelanders and Survivors - Check out the stretch miniaturesoutlandersI couldn't resist these, especially after a KS I was backing for almost $200 got cancelled (a blessing really as I was having second thoughts about it) As I'm keen on Post-Apoc generally, adding a more wastelands/mad Max vibe is not an issue, particularly as I have a couple of old school Pen and paper RPGs I will be running shortly.
|
|
|
|
Post by zombiespider on Mar 28, 2016 13:36:18 GMT
That 2nd link gives a 404 error |
|
|
|
Post by synicbast on Mar 29, 2016 12:02:17 GMT
That 2nd link gives a 404 error fixed now... |
|


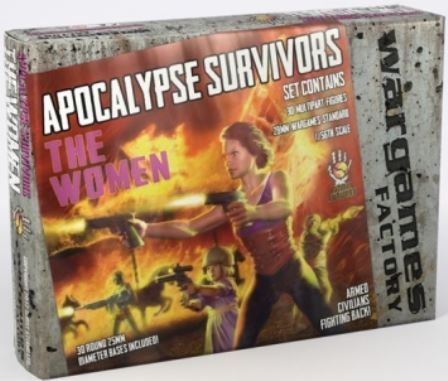


 . The Apocalypse Surivor boxes were amazing though and check out the weapon sprues! You can use them to decorate weapon raxks ans ao on, which is what I did with a few of mine heheh.

